Workflow management in Embed#
Feature availability
Embed requires an embed license. For more information about when to use Embed, as well as costs and licensing processes, refer to Embed on the n8n website.
When managing an embedded n8n deployment, spanning across teams or organizations, you will likely need to run the same (or similar) workflows for multiple users. There are two available options for doing so:
| Solution | Pros | Cons |
|---|---|---|
| Create a workflow for each user | No limitation on how workflow starts (can use any trigger) | Requires managing multiple workflows. |
| Create a single workflow, and pass it user credentials when executing | Simplified workflow management (only need to change one workflow). | To run the workflow, your product must call it |
Warning
The APIs referenced in this document are subject to change at any time. Be sure the check for continued functionality with each version upgrade.
Workflow per user#
There are three general steps to follow:
- Obtain the credentials for each user, and any additional parameters that may be required based on the workflow.
- Create the n8n credentials for this user.
- Create the workflow.
1. Obtain user credentials#
Here you need to capture all credentials for any node/service this user must authenticate with, along with any additional parameters required for the particular workflow. The credentials and any parameters needed will depend on your workflow and what you are trying to do.
2. Create user credentials#
After all relevant credential details have been obtained, you can proceed to create the relevant service credentials in n8n. This can be done using the Editor UI or API call.
Using the Editor UI#
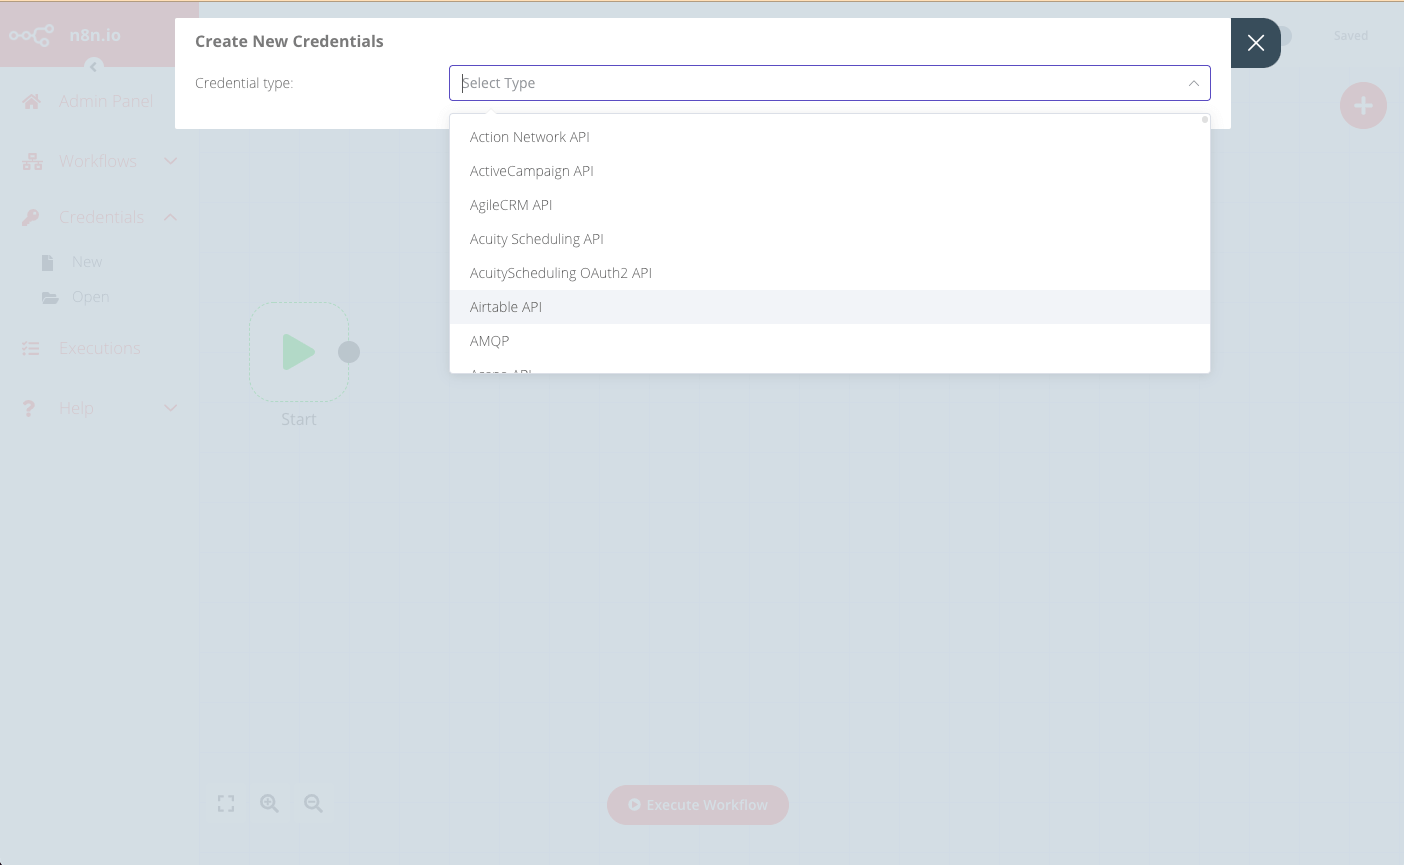
- From the menu select Credentials > New.
- Use the drop-down to select the Credential type to create, for example Airtable.

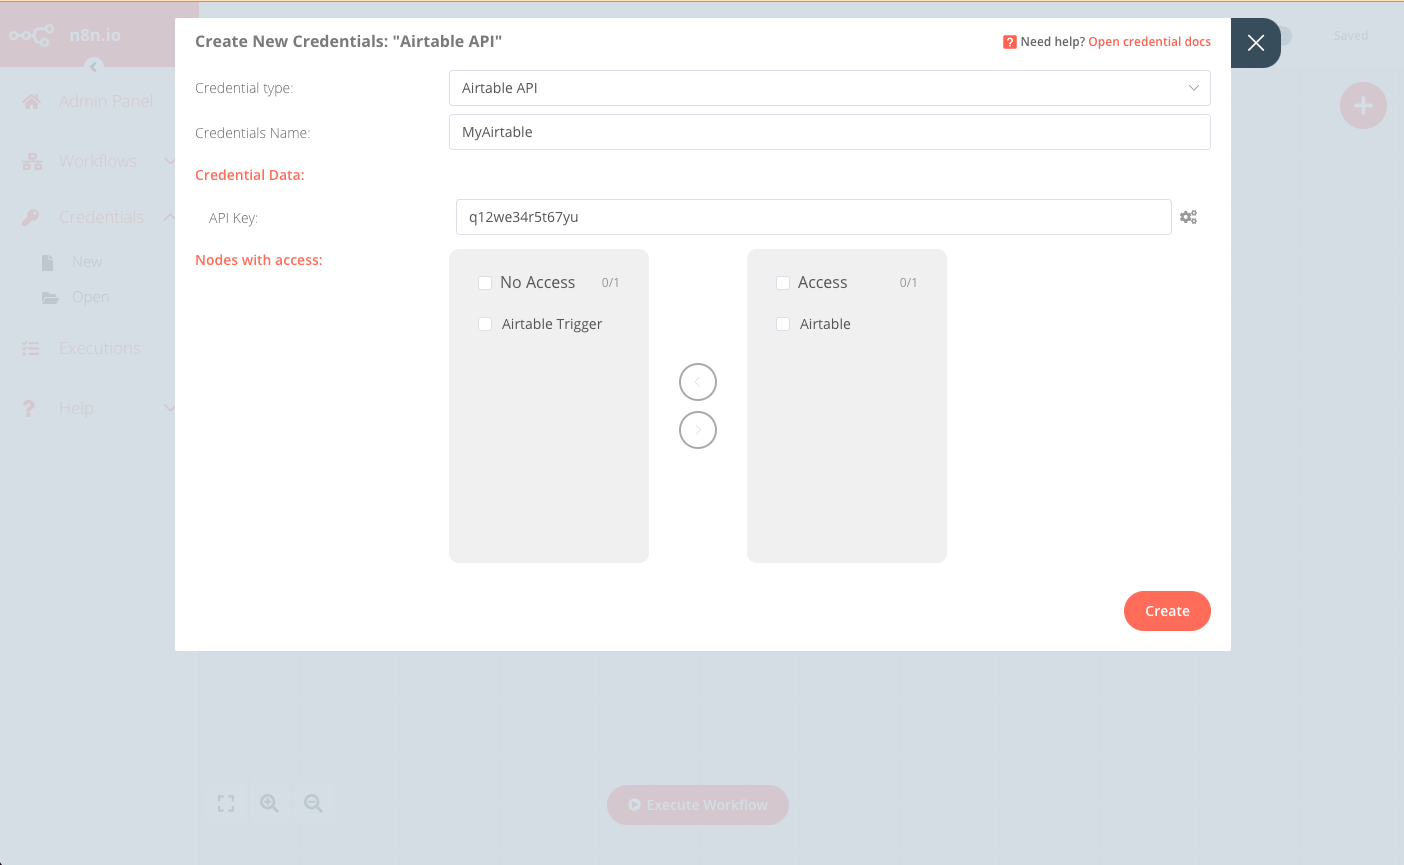
- In the Create New Credentials modal, enter the corresponding credentials details for the user, and select the nodes that will have access to these credentials.

- Click Create to finish and save.
Using the API#
The frontend API used by the Editor UI can also be called to achieve the same result. The API endpoint is in the format: https://<n8n-domain>/rest/credentials.
For example, to create the credentials in the Editor UI example above, the request would be:
1 | |
With the request body:
1 2 3 4 5 6 7 8 9 10 11 12 | |
The response will contain the ID of the new credentials, which you will use when creating the workflow for this user:
1 2 3 4 5 6 7 8 9 10 11 12 13 14 15 16 17 18 | |
3. Create the workflow#
Best practice is to have a “base” workflow that you then duplicate and customize for each new user with their credentials (and any other details).
You can duplicate and customize your template workflow using either the Editor UI or API call.
Using the Editor UI#
-
From the menu select Workflows > Open to open the template workflow to be duplicated.
-
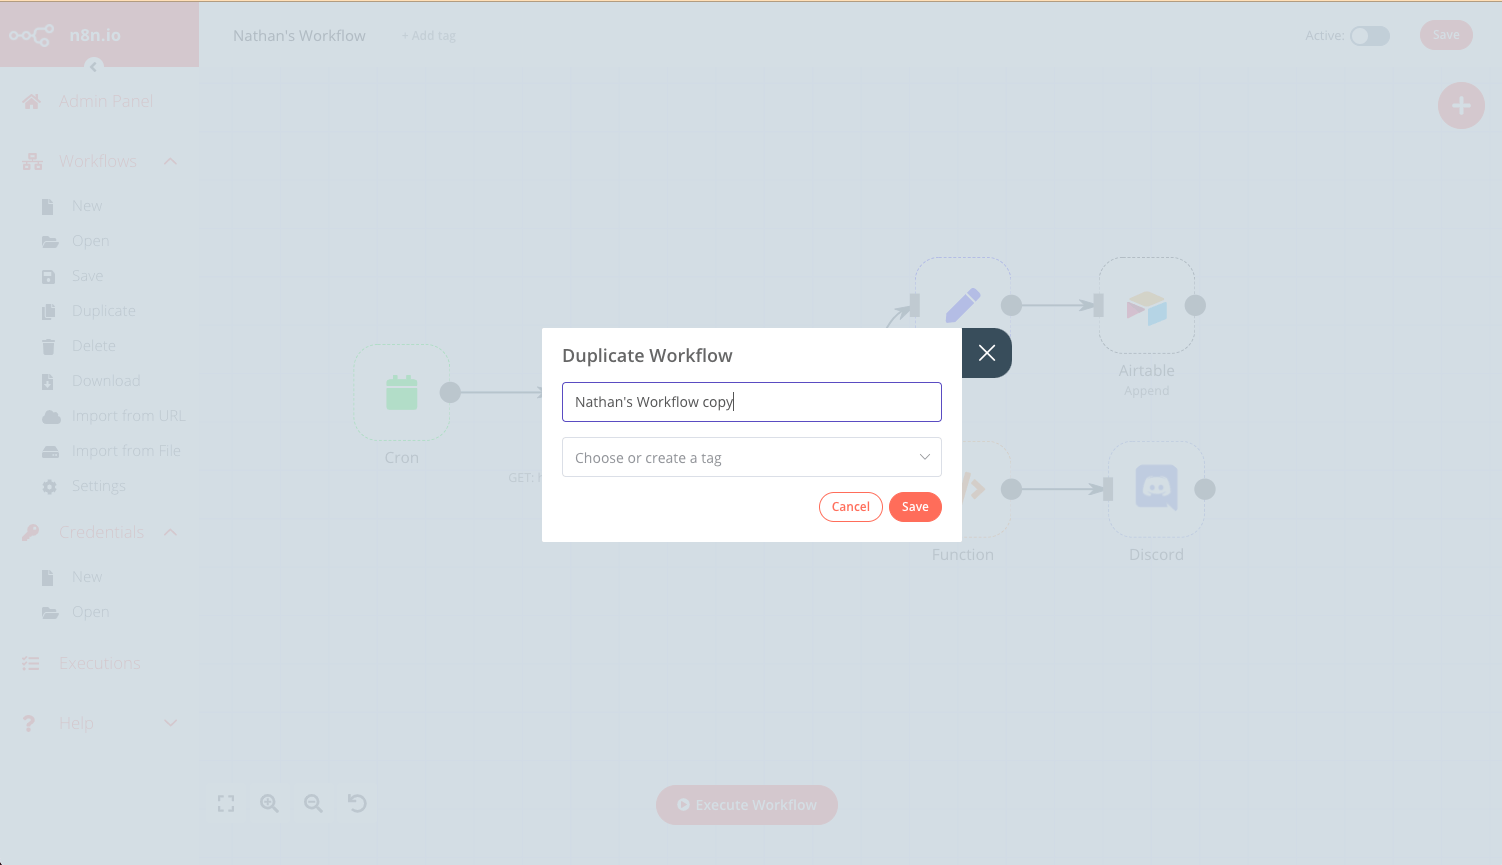
Select Workflows > Duplicate, then enter a name for this new workflow and click Save.

-
Update all relevant nodes to use the credentials for this user (created above).
-
Save this workflow set it to Active using the toggle in the top-right corner.
Using the API#
- Fetch the JSON of the template workflow using the endpoint:
https://<n8n-domain>/rest/workflows/<workflow_id>1GET https://<n8n-domain>/rest/workflows/1012
The response will contain the JSON data of the selected workflow:
1 2 3 4 5 6 7 8 9 10 11 12 13 14 15 16 17 18 19 20 21 22 23 24 25 26 27 28 29 30 31 32 33 34 35 36 37 38 39 40 41 42 43 44 45 46 47 48 49 50 51 52 53 54 55 56 57 58 59 60 61 62 63 64 65 66 67 68 69 70 71 72 73 74 75 76 77 78 79 80 81 82 83 84 85 86 87 88 89 90 91 92 93 94 95 96 97 98 99 100 101 102 103 104 105 106 107 108 109 110 111 112 113 114 115 116 117 118 119 120 121 122 123 124 125 126 127 128 129 130 131 132 133 134 135 136 137 138 139 140 141 142 143 144 145 146 147 148 149 150 151 152 153 154 155 156 157 158 159 160 161 162 163 164 165 166 167 168 169 170 171 172 173 174 175 176 177 178 179 180 181 182 183 184 185 186 187 188 189 190 191 192 193 194 195 196 197 198 199 200 201 202 203 204 205 206 207 208 209 210 211 212 213 214 215 216 217 218 219 220 221 222 223 224 225 226 227 228 | |
-
Save the returned JSON data and update any relevant credentials and fields for the new user.
-
Create a new workflow using the updated JSON as the request body at endpoint:
https://<n8n-domain>/rest/workflows1POST https://<n8n-domain>/rest/workflows/
The response will contain the ID of the new workflow, which you will use in the next step.
- Lastly, activate the new workflow:
1PATCH https://<n8n-domain>/rest/workflows/1012
Passing the additional value active in your JSON payload:
1 2 3 4 5 | |
Single workflow#
There are four steps to follow to implement this method:
- Obtain the credentials for each user, and any additional parameters that may be required based on the workflow. See Obtain user credentials above.
- Create the n8n credentials for this user. See Create user credentials above.
- Create the workflow.
- Call the workflow as needed.
Create the workflow#
The details and scope of this workflow will vary greatly according to the individual use case, however there are a few design implementations to keep in mind:
- This workflow must be triggered by a Webhook node.
- The incoming webhook call must contain the user’s credentials and any other workflow parameters required.
- Each node where the user’s credentials are needed should use an expression so that the node’s credential field reads the credential provided in the webhook call.
- Save and activate the workflow, ensuring the production URL is selected for the Webhook node. Refer to webhook node for more information.
Call the workflow#
For each new user, or for any existing user as may be needed, call the webhook defined as the workflow trigger and provide the necessary credentials (and any other workflow parameters).